2020-01-09
Installing 64-bit Debian on a Raspberry Pi 4
The CPU in the Raspberry Pi 3 and 4 implements the 64-bit ARMv8 architecture. But Raspbian, the Debian-derived official operating system for Raspberry Pis, remains 32-bit-only to maximise compatibility across the generations.
I recently got a Raspberry Pi 4, and I'd like to use it for 64-bit ARM development. Various 64-bit Linux distributions have been shown running on the Raspberry Pi, but I wanted to stick to Debian which I know well. While some work has been done to add Raspberry Pi support to Debian, I haven't seen anyone claiming to have it working on the Raspberry Pi 4.
The pieces do exist to make this work. The Raspberry Pi Foundation has made a 64-bit kernel available for testing. Debian has good support for the arm64 architecture (i.e. the 64-bit instruction set of ARMv8) And it's not that hard to bootstrap a Debian system from scratch (if you know how). So I was able to get 64-bit Debian system running on my Raspberry Pi 4.
In outline, the process is:
- Put Raspbian onto a micro SD card.
- Update it with the 64-bit kernel made available for testing by the Raspberry Pi.
- Add a new partition to the SD card for Debian
- Bootstrap Debian into it by running debootstrap from another Linux system.
Detailed installation process
Install Raspbian onto a micro SD card
We're going to install Raspbian and Debian side by side on a single card, so you'll need one with enough space for that. I used a 64GB card, but 16GB should be enough.
Follow the normal process to install Raspbian onto the card. I installed the “Raspbian Buster with Desktop” edition, but Lite would probably work too.
Update to the 64-bit kernel
Put the card into the Raspberry Pi, and do the initial boot and setup as normal. Then follow these instructions to install and reboot into the 64-bit kernel.
Make another partition for Debian
With the 64-bit kernel in place, power down the Raspberry Pi and move the micro SD card back to another Linux system.
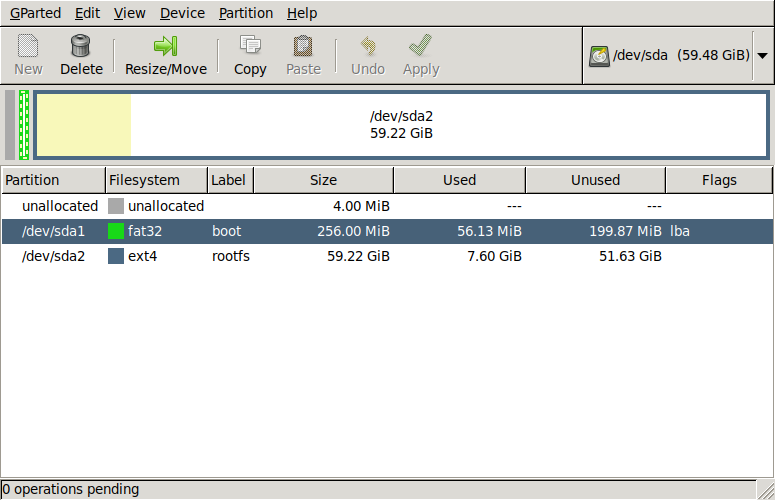
Installing Raspbian will have resulted in two partitions on the card: The first one is a small /boot partition with a FAT filesystem, and the second one is the main ext4 filesystem for the Raspbian system. We're going to shrink the Raspbian filesystem down, and then add a third partition for Debian.
I used gparted for this. Here's how the micro SD card looks to begin with (SD cards show up as /dev/sda on my laptop, but the device name might well be different for you):
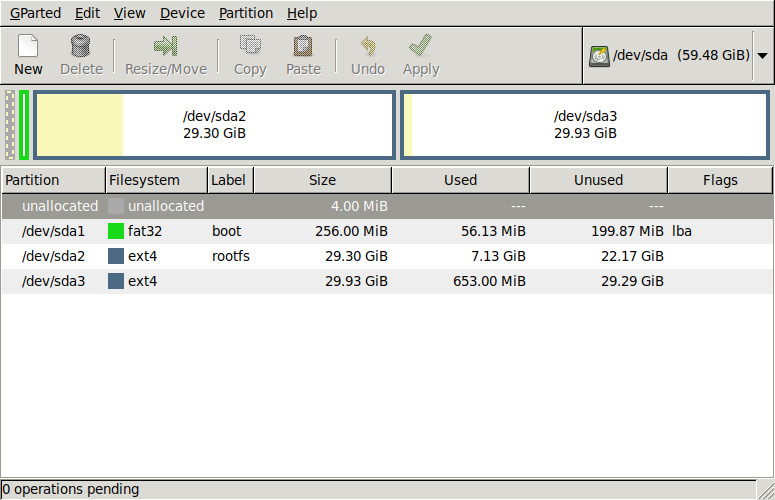
And here's the end result after shrinking the Raspbian filesystem in /dev/sda2 and adding a new ext4 partition /dev/sda3 for Debian:
Bootstrap the Debian system
We're going to create a bare-bones Debian system in the new partition using debootstrap. It's in the debootstrap package for Debian/Ubuntu/etc. (and packages are also available for some non-Debian-based Linux distros).
Below, # indicates commands to be run as root, or prefixed with sudo as appropriate.
Mount all the partitions from the card at convenient locations. On my system the relevant block devices are /dev/sdaN (they may be different on your system, so please check), so:
# mkdir /mnt/boot /mnt/raspbian /mnt/debian
# mount /dev/sda1 /mnt/boot
# mount /dev/sda2 /mnt/raspbian
# mount /dev/sda3 /mnt/debian
Now, run debootstrap:
# debootstrap --include=wpasupplicant,dbus --arch=arm64 --foreign buster /mnt/debian
That will download the packages for a minimal Debian system into the new partition. (The --include option makes sure we have the packages needed to get wifi working.)
Next, there are some critical files we need to copy across from the Raspbian partition:
# cp -a /mnt/raspbian/lib/modules /mnt/raspbian/lib/firmware /mnt/debian/lib/
We also need to copy /etc/fstab across from Raspbian, and edit it slightly:
# cp -a /mnt/raspbian/etc/fstab /mnt/debian/etc/fstab
The contents of /mnt/debian/etc/fstab should be something like:
proc            /proc           proc    defaults          0       0
PARTUUID=5e3da3da-01  /boot           vfat    defaults          0       2
PARTUUID=5e3da3da-02  /               ext4    defaults,noatime  0       1
# a swapfile is not a swap partition, no line here
#   use  dphys-swapfile swap[on|off]  for that
Edit the PARTUUID of the root filesystem line to change the suffix -02 to -03, so that it becomes:
PARTUUID=5e3da3da-03 / ext4 defaults,noatime 0 1
Debootstrap puts the hostname of the machine you run it on into /etc/hostname, which can be confusing, so fix it up now:
# echo rpi >/mnt/debian/etc/hostname
If you configured wifi under Raspbian, then copy the settings over to make it easy to get it working under Debian:
# cp -a /mnt/raspbian/etc/wpa_supplicant/wpa_supplicant.conf /mnt/debian/etc/wpa_supplicant
One last step to prepare the card: We need to edit the cmdline.txt file in the boot partition that provides the kernel command line to the Raspberry Pi bootloader. Initially, the contents of /mnt/boot/cmdline.txt should be something like:
console=serial0,115200 console=tty1 root=PARTUUID=5e3da3da-02 rootfstype=ext4 elevator=deadline fsck.repair=yes rootwait quiet splash plymouth.ignore-serial-consoles
(You can make a copy of the original contents, so that you can restore it to boot Raspbian again from the same card.)
We need to edit /mnt/boot/cmdline.txt in two ways:
- Change the suffix of the root= setting from -02 to -03 (to tell it to boot from the Debian partition).
- Remove everything after rootwait (but keep rootwait).
For me, the result is:
console=serial0,115200 console=tty1 root=PARTUUID=5e3da3da-03 rootfstype=ext4 elevator=deadline fsck.repair=yes rootwait
Now we can unmount the partitions from the card, and do a couple of syncs for good luck, and then the card can be removed
# umount /mnt/boot /mnt/raspbian /mnt/debian ; sync ; sync
Finishing the bootstrap process on the Raspberry Pi
Put the card back into the Raspberry Pi, and power it up. It should boot in a few seconds, and if you press the enter key, you'll see a command prompt:
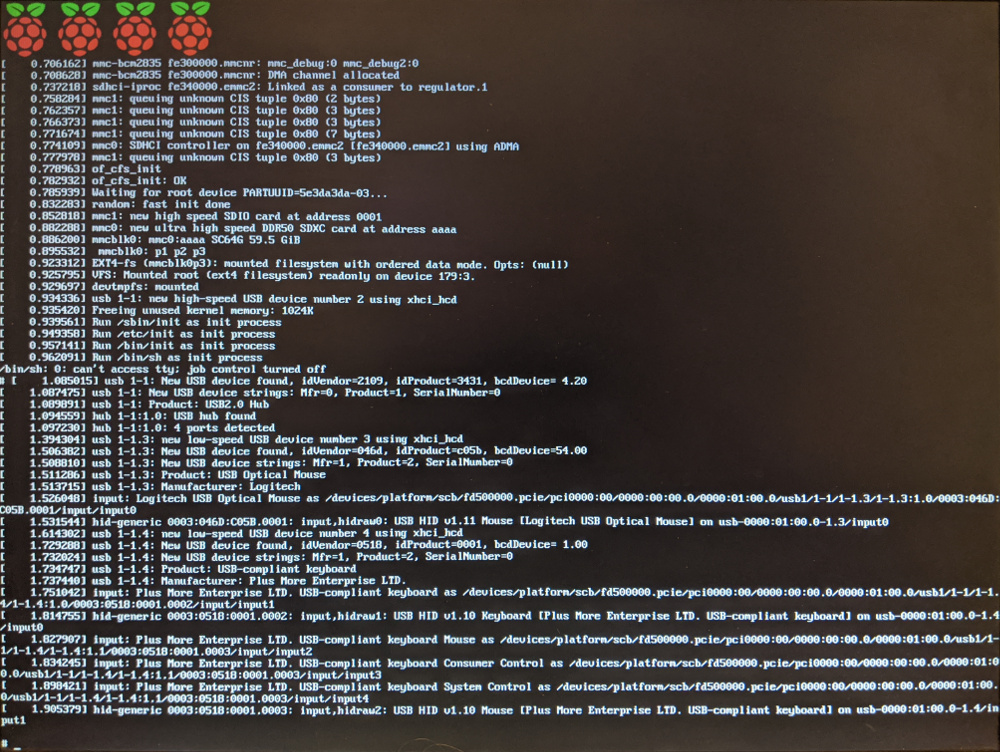
At this point, you just have a shell running and not much else available (and command history and tab completion won't work in the shell). To complete the Debian installation, we need to run the second stage of the bootstrapping process, by typing these commands:
# mount /proc
# mount -o remount,rw /dev/root /
# /debootstrap/debootstrap --second-stage
That last command might take several minutes. Then, set a root password:
# passwdAnd reboot:
# mount -r -o remount -f /dev/root ; sync ; sync ; reboot -f
When it reboots this time, you should have a minimal but functional Debian system, with a normal login prompt.
To get wifi working, create /etc/network/interfaces.d/wlan0 containing:
auto wlan0
allow-hotplug wlan0
iface wlan0 inet dhcp
	wpa-conf /etc/wpa_supplicant/wpa_supplicant.conf
Then do
# ifup wlan0
Wrapping up
At this point, you should have a working 64-bit Debian system on your Raspberry Pi. But it's still a very minimal system, so you'll need to add packages, users, etc. to do much with it. Probably some things don't work, but I wasn't able to find anything obvious, even doing things like installing the full GNOME desktop environment.